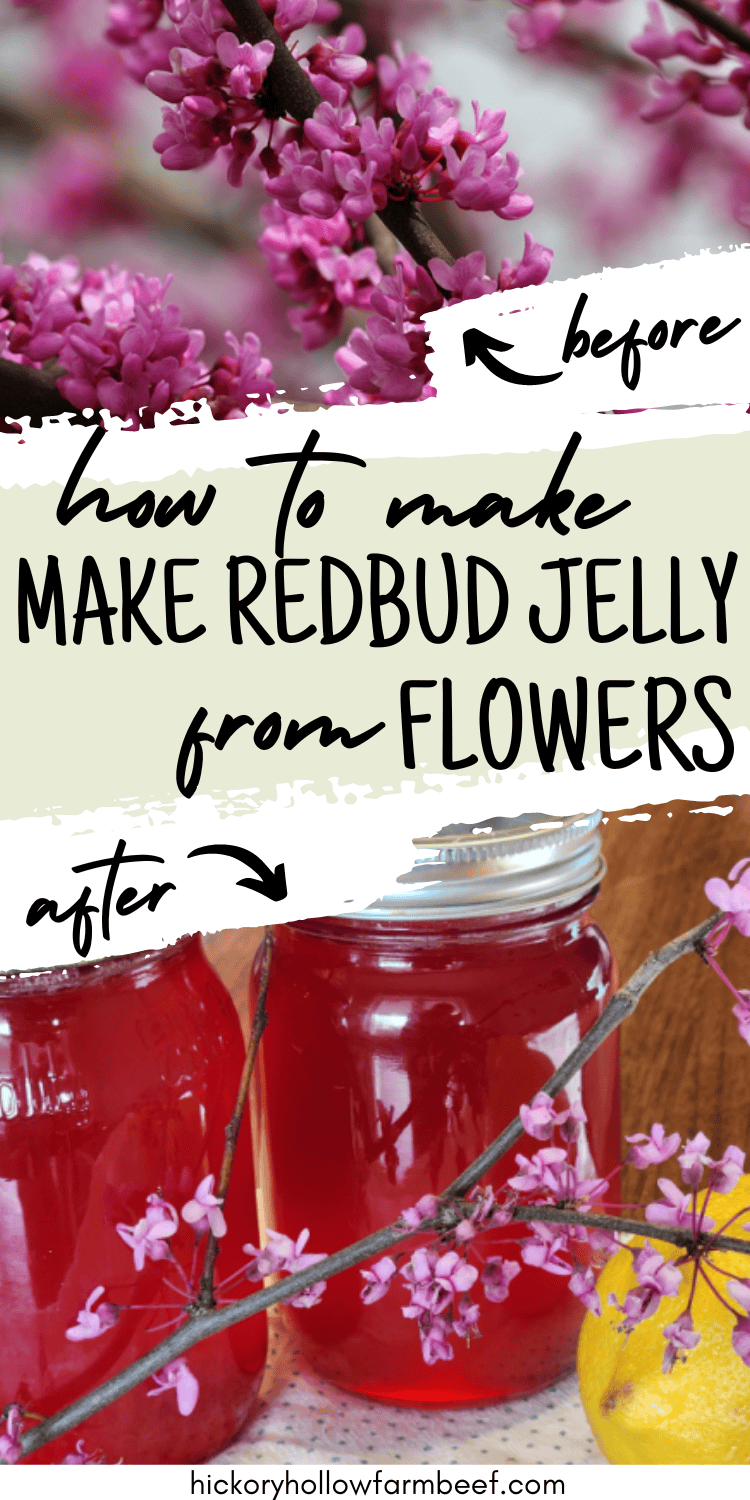
Spring is always such a welcome season! Seeing the grass begin to green up, daffodils pop through the ground, and the redbud trees begin to bloom are all signs that winter’s grasp is ending and summer is coming! And if you are like me, you are eager to get back to canning and creating delights in your kitchen again. How about making redbud jelly from those beautiful Redbud trees?
Note: This post contains affiliate links. If you purchase through a link, Hickory Hollow Farm will receive a small commission, at no additional cost to you, used toward keeping our recipes and country life coming to your inbox! I only recommend products I appreciate and trust. Thank you for your support! Full disclosures here.
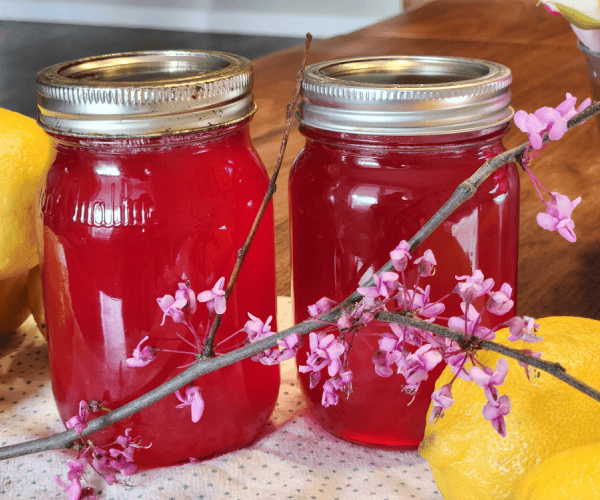
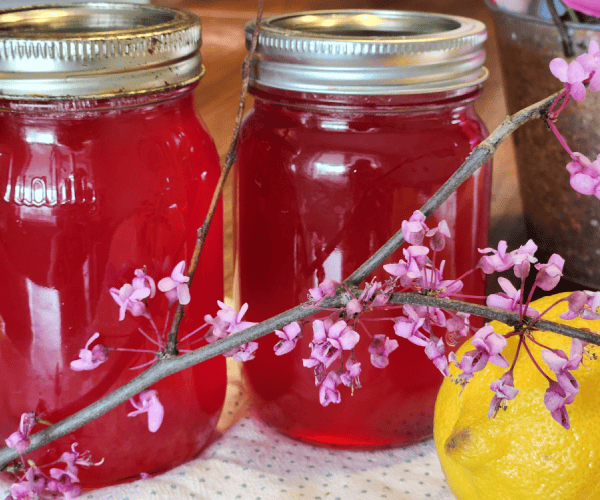
Redbud Jelly
I’ve always been charmed by the vibrant hues of spring trees, especially the redbud. Its blossoms not only signal the arrival of warmer days but also offer a unique opportunity for culinary creativity. And as my daughter and I discovered, you can craft a beautiful pink redbud jelly and syrup from these blossoms! If you are ready to do a little spring foraging, then let’s make jelly from these beautiful pink and purplish redbud blossoms.
Redbud blossoms have a subtly sweet taste, perfect for jellies and syrups. The process of picking the blossoms and making the jelly, though it requires patience, is worth every minute. Making redbud jelly is slightly different in the fact that you have to make a tea out of the blooms before you can make your jelly. Though there is an extra step, the process is pretty simple! And if you have kids at home, they will enjoy jumping in to help forage and harvest the blooms!
Key Takeaways:
- Foraging tips are crucial for sourcing the best redbud flowers, ensuring the flavor is vibrant and fresh.
- Making redbud tea is the foundation of a richly flavored redbud jelly, enhancing its natural sweetness and depth.
- Canning in the spring allows the essence of spring trees to be preserved, providing a taste of the season throughout the year.
Foraging Redbud Flower Tips
Once you learn how to recognize a Redbud tree, you will realize that they are everywhere in spring. And thankfully, you don’t need more than a tree or two in order to make your redbud jelly! These enchanting spring trees are more than just a feast for the eyes; they offer up their flowers for delightful culinary uses, including making redbud tea and the coveted redbud jelly. To ensure a bountiful and responsible harvest, follow these foraging tips closely.
The best time to gather redbud flowers is in early spring, just as the buds start to bloom. They’ll be at their most fragrant and flavorful, perfect for canning in the spring. Look for trees in areas free of pesticides and away from busy roads to avoid contaminants. It’s critical to forage just what you need, leaving plenty for the bees and the tree’s continued health. This practice guarantees you can return year after year to the same trees for their generous offerings.

When harvesting, gently pluck the flowers from the branches. No need to remove limbs. This care preserves the redbud’s qualities for both jelly and tea, allowing for a more vibrant flavor profile in your kitchen creations.
Making Redbud Tea
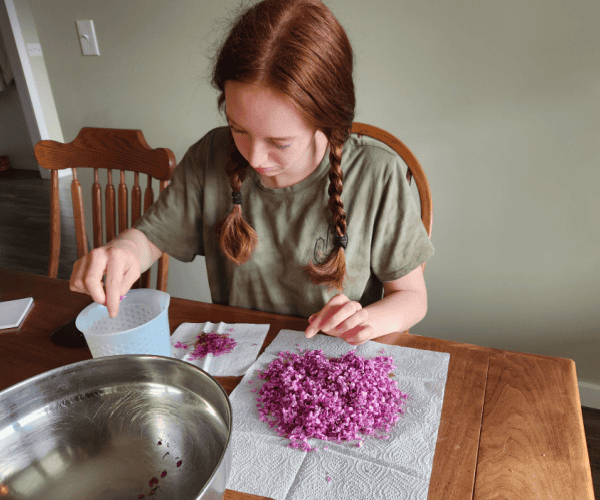
First, gather your buds. You will need around 5 cups of blooms for this recipe. Gather your redbud flowers and bring inside. Then you can remove the redbud stems while sitting down. Removing the blooms does take a little time, so get your kids involved while you all talk or listen to a podcast! Remove just the blooms, though it is ok if you miss a few stems as you will be straining everything out later.
Next, you will make the redbud tea. Rinse off your redbud blooms. Pour your 5 cups of blooms into a half gallon mason jar and pour over 8 cups of boiling water. This step is going to pull all the goodness out of the blooms and enhance the flavor of your jelly. The color will at first look rather bland. But just wait! Allow the water to cool, before placing your redbud tea into the refrigerator for 24 hours.
Also, while your tea is doing its magic, go ahead and gather your half pint jelly jars. Place them in the the dishwasher so they will get washed and sterilized when you run the dishwasher tonight!
How to Make Redbud Jelly
For the redbud jelly recipe, you’ll need a simple list of ingredients: redbud tea, sugar, pectin , and a key player—lemon juice. Lemon juice not only intensifies the floral notes of the redbud but also ensures the jelly sets correctly, thanks to its role in the pectin-sugar reaction. Also, it acts as a natural preservative, allowing you to savor the flavors of spring well beyond the season.
To get started, after your tea has sat for 24 hours, remove your tea from the refrigerator and strain out the blooms and any stems that may have snuck into your blooms. You can strain the tea twice in order to remove any blooms or stems from your tea. Add four tablespoons of lemon juice. A strainer like this one is handy.
Now, you will make your jelly. But first, make sure that your jelly jars are sterilized and ready to go. If you didn’t place them in the dishwasher overnight, then place them in some boiling water to clean and sterlize.
Pour your redbud tea with the lemon juice into a pot and bring to a boil. Then add two boxes of low sugar pectin and stir. Bring tea to a rolling boil!
Once your redbud tea and pectin comes to a rolling boil, add the eight cups of sugar. Bring to another rolling boil, and then boil for one minute.
Lastly, ladle your jelly into jelly jars, using a funnel like this one, leaving 1/4 inch of headspace up top. Wipe down the rims to remove any spilled jelly, so that your new canning lids will adhere and seal. Add your new canning lids and rims and seal the jars.
Add several inches of water to a water canning pot. You can use a canner or an extra large pot. Add all your jelly jars to the water canner and cover with at least an inch of water. Bring your water canner to a low boil and process for 10 minutes.
Enjoy canning? Pin this Strawberry Lemonade Concentrate recipe for later!
Once the redbud jelly jars have processed for 10 minutes, turn off stove. Allow water to cool slightly, before removing filled jelly jars to a dishtowel on the counter. Listen to the beautiful popping sound of jelly jars sealing.
Canning Redbud Jelly with Sure Jell
There are a couple of canning tips to help your redbud jelly set up and seal successfully!
Use Pectin. One, make sure to use pectin and that your box of pectin is in date! Utilizing Sure Jell pectin or grocery pectin ensures that all your hard work will pay off. Around early spring, I start buying a box of pectin and canning lids whenever I am at the store, to stock up what I need. Toward the middle of summer, canning items often start to run out
Watch for Chipped Jars. Also make sure you are using cleaned jelly jars that do not have any chips in the rim of the glass jar. Unless your family eats jelly every day, I prefer to use the smaller jars for jellies and jams. That way if you have a craving for jam and toast, your family can indulge without feeling like everyone needs to eat a ton of jelly. Also, the small jelly jars make a beautiful homemade gift when accompanied with a loaf of fresh bread!
Carefully, Clean Jars and Lids. And be sure to wipe down rims of the jelly jars, after pouring in the hot jelly, before attaching a new canning lid. This little task will eliminate most sealing problems.
Use Exact Sugar Amount and Lemon Juice. Jelly needs sugar to set up. So before you start experimenting with using different amounts of sugar, make sure you have found an actual low sugar recipe that specifically calls for less sugar.
Make Sure Jars Seal. Before you place your jars in the pantry, make sure that the lids are all sealed. If you have a jar that still has give when you push it down on top, you have two options. You can either place it back in the water can and reprocess. Or you can place in the fridge and eat that jar first.
Making Redbud Jelly in Spring
Have fun on this journey of making redbud jelly and embracing the art of canning flowers. It’s a unique opportunity to capture the essence of spring in a jar, utilizing the blossoms of spring trees. This project, from foraging for redbud flowers to savoring the jelly on a chilly winter day, celebrates the bounty of the earth. So, grab your Sure Jell and your canning jars, and let’s preserve a bit of spring together.
Redbud Jelly
Equipment
- 1 Canner or large pot
- 12 Half-pint jars
- 1 Funnel
- 1 Canning tongs
- 12 canning lids and rings lids must be new
- 1 1/2 gallon jar or container
Ingredients
- 5 cups redbud blossoms
- 4 tbls lemon juice
- 2 boxes low sugar pectin like Sure Jell
- 8 cups sugar
- 8 cups boiling water
Instructions
- Pick redbud blossoms by gentle pulling them from the redbud tree branches.
- Place blossoms on a clean hand towel or paper towel and pick off stem. Measure out 5 cups of blossoms.
- Gentle place blossoms in a strainer and wash with cool water. Drain.
- Place 5 cups of cleaned blossoms into a 1/2 gallon mason jar. Pour 8 cups of boiling water over flowers. Stir. Allow to cool, cover and place in the fridge for 24 hours.
- The next day, strain out the the flowers and any loose stems.
- Pour in 4 tablespoons of lemon juice into the filtered redbud tea.
- Pour redbud tea into a large pot and place on stove. Bring to a boil.
- Add in the pectin to the boiling redbud tea. Bring to a rolling boil.
- Add 8 cups of sugar into the pectin and redbud tea mixture. Keep stirring till mixture comes to a rolling boil. Continue to boil for 1 minute.
- Using a canning funnel and ladle, pour hot mixture into clean, sterilized half-pint jars.
- Wipe down rims of canning jars with a damp paper towel to remove any jelly. Seal jars with a new lid and a canning ring.
- Place jelly filled half-pint jars into a canner filled with water. Make sure water covers all the jars by at least 1 inch. Loosely cover canner.
- Bring water to a slow boil and process jars for 10 minutes.
- Remove jars and place them on a towel on countertop to cool. Store in pantry.