Nothing says decadent love like peanut butter and chocolate. I blame my obsession with peanut butter pie on Frisch’s. Now, I didn’t visit a Frisch’s very often growing up, but I remember well the few times I got to go. Those big shiny glass displays with pies, right when you walk in the restaurant doors, were emblazoned on my mind! Cream pies, so fluffy looking, piled high to the sky with whip cream or meringue topping. So I set out to create the perfect chocolate no bake peanut butter pie without cream cheese. My peanut butter pie recipe is creamy, with rich chocolate and peanut butter flavor and plenty of cool whip, with no cream cheese in sight!
Decadent No Bake Peanut Butter Pie: the Ultimate Cream Cheese-free Recipe
Why No Bake?
I’ve always found that the allure of no-bake recipes lies in their sheer simplicity! They save us precious time. And no bake approach to dessert-making means I don’t have to watch over the baking process for an hour, ensuring my kitchen stays cooler and more comfortable, especially during those sweltering summer months.
Now, my recipe does include a homemade pie crust, but that only needs to be in the oven for 10 minutes. Then you pour your luscious peanut butter filling into the prepared crust. Or you can use a premade pie crust or an oreo pie crust. I have used a graham cracker pie crust once in a pinch, but it was not a favorite. It’s a small but significant way to keep the heat down, making no bake peanut butter pie an ideal choice for spring gatherings, Valentine’s or when you simply crave something sweet without the fuss of watching the oven for an hour!
Moreover, the no-bake method is wonderfully accessible to beginners or anyone who might be intimidated by traditional baking. There’s a certain confidence that comes from knowing you can assemble a delicious, visually appealing dessert like a chocolate peanut butter pie without the potential pitfalls of oven baking. Sometimes baking a pie in the oven can be tricky as you are trying to do a little guesswork as to when it is done enough but not overdone.
But this no-bake peanut butter pie recipe, in particular, devoid of cream cheese and relying on cool whip, offers a delightful balance of flavors and textures and looks amazing!
Key Takeaways:
- No-bake recipes save time and keep the kitchen cooler, perfect for busy individuals and warm months.
- Perfect for beginners, these recipes offer a fail-safe way to create mouthwatering desserts without the stress of baking.
- Our no-bake peanut butter pie recipe combines convenience and taste superbly, even without cream cheese.
Cool Whip: A Creamy Substitute
I opted for cool whip as a creamy substitute in my no bake peanut butter pie recipe. One, I love cool whip! It is yummy and cheap! It blends with the peanut butter and chocolate, creating a dessert that feels indulgent without the heaviness cream cheese sometimes brings. And I find that kids often don’t like cream cheese.
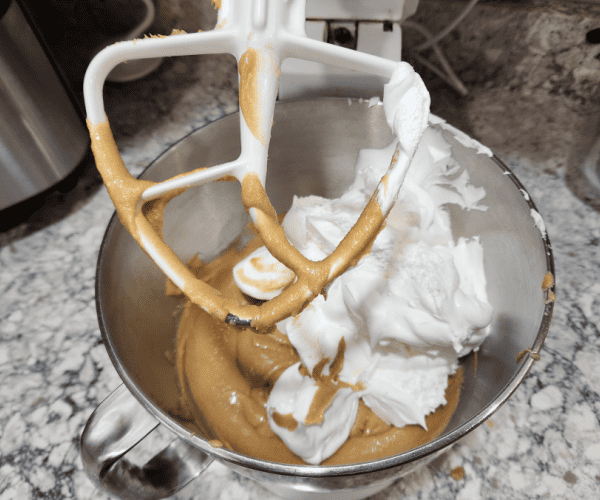
This recipe actually calls for 2 containers of cool whip. The containers keep getting smaller, but I prefer the balance of the cool whip with the brown sugar peanut butter mixture. So I buy 2 containers, using one and half total containers in the pie.
Preparing the Pie Layer
As I mentioned, I use a very simple pie crust for my base layer. This makes it easier to cut your pie into pieces. And allows you to add a chocolate layer that comes out of the pie plate easily.
This is my favorite pie crust! I use it for most of my pies as it can be mixed in the pie pan. You simple add all the ingredients directly into the pie pan, mix with a fork and then press into pie dish! So simple! No rolling or waiting for it to chill in the refrigerator. Pop into the oven and bake for 9-10 minutes. Cool.
Adding the Chocolate Layer
Now, it was time for the chocolate layer. There are several layers to my peanut butter pie. But don’t let that worry you. They are all pretty simple. And the chocolate layers you can melt in the microwave using the same microwaveable dish! The first chocolate later is poured into the bottom of the cooked and cooled pie crust. I chose semi-sweet chocolate, melted until it velvety smooth. Then, I pour it gently over the cooled pie crust base.
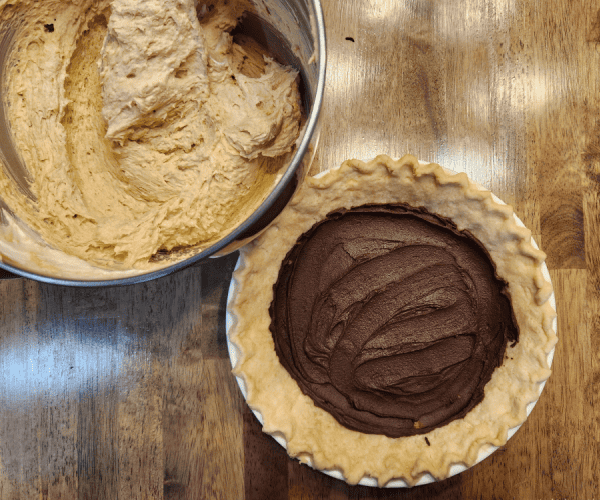
Smoothing out the chocolate takes a light hand. I use the back of a spoon or a frosting knife, guiding the chocolate with a steady hand to cover every inch evenly in the bottom of the pie pan.
Place your pie crust with the chocolate layer on the counter to cool. If it is a warmer day, you can place the pie crust in the refrigerator for 10 minutes.
Peanut Butter Layer Magic
The peanut butter layer is made up of melted butter and brown sugar that is then cooled and beaten together with creamy peanut butter. Then whip cream is folded in for the stuff peanut butter pie dreams are made of!
A couple tricks to keep in mind. Make sure that the melted butter and brown sugar are mixed well together. You want the brown sugar to be mixed into the butter as much as possible for a smooth and not grainy consistency. Then you want to wait for the brown sugar mixture to cool a bit. Typically, I make my brown sugar mixture first then set it aside to cool while I make the pie crust.
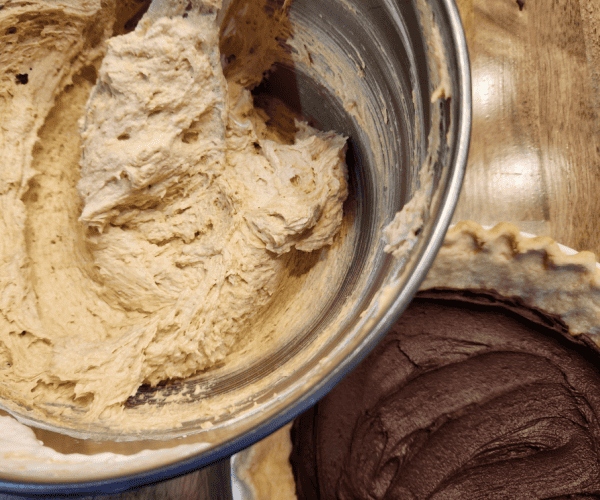
But don’t let the brown sugar and butter mixture cool off too much or it won’t keep the nice consistency. Then add in the peanut butter and mix in a mixer. You can whisk by hand, but I like to really blend up everything using a mixer.
Lastly, add in the thawed cool whip. The process requires a gentle touch. First, I scooped the cool whip into the whipped brown sugar and peanut butter mixture. I blend it for a couple seconds using the mixer. And then I fold the rest in by hand so that I don’t overbeat the cool whip. This method gives the no bake peanut butter pie its signature fluffy layer. And once mixed well, ensures not a single streak remains.
Layer the whipped cool whip and peanut butter mixture atop the chocolate base in the baked pie shell. With a frosting spatula, I spread the peanut butter mixture, avoiding any disturbance to the layer beneath. This layer transforms your pie from a mere few ingredients to a decadent indulgence devoid of cream cheese.
The Final Chocolate Touch
The final chocolate touch on our no bake peanut butter pie is a chocolate layer! I’ve found that melting chocolate and spreading it over the cool whip and peanut butter layers creates a nice contrast to the peanut butter brown sugar pie adding in an incredible depth of flavor and texture. To customize, consider experimenting with dark chocolate for a bittersweet edge.
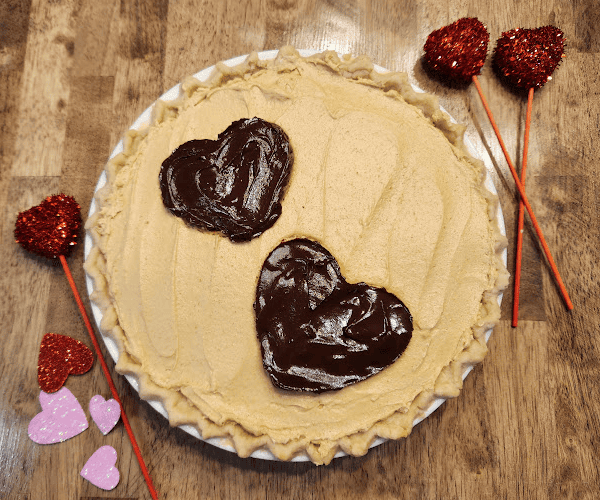
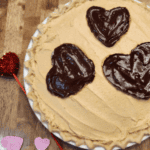
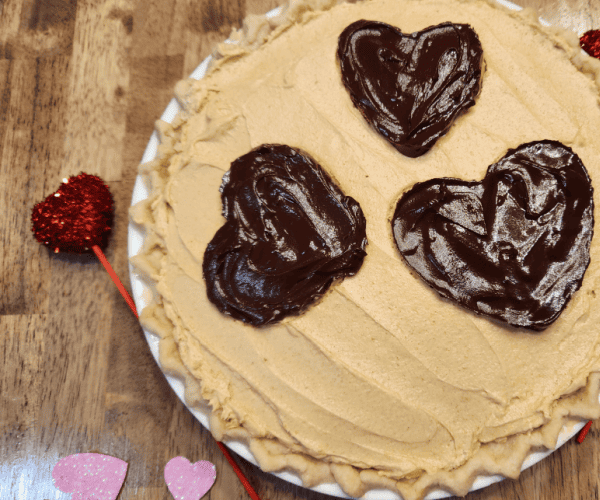
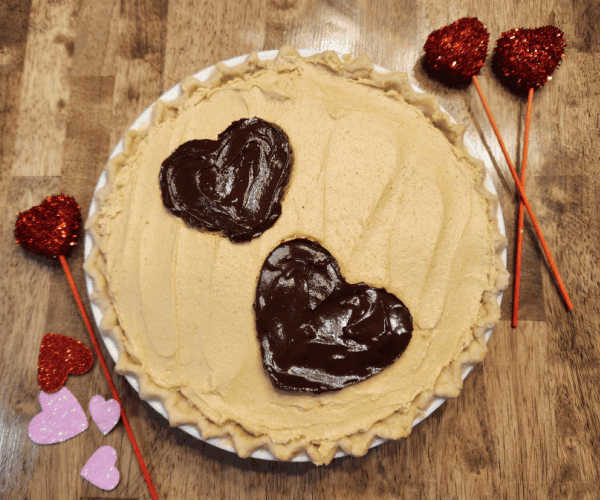
Applying the chocolate layer can be a fun and creative process. Instead of merely spreading the chocolate, why not pour it in patterns, or use a piping bag for intricate designs? For my pie, I used a heart shaped cookie cutter and poured the chocolate on top in heart shapes. For an extravagant touch, sprinkle chocolate shavings or peanut butter cups on top. These small garnishes add not only aesthetic appeal but also an extra chocolatey punch. This final touch can bring a simple elegance or fun to your pie!
Step by Step How to Make a No Bake Peanut Butter Pie
Pull your cool whip containers out of the freezer, if they are still frozen, to thaw on counter. Turn on oven to preheat to 350 F.
Pour all your pie ingredients directly into a 9 inch pie pan.
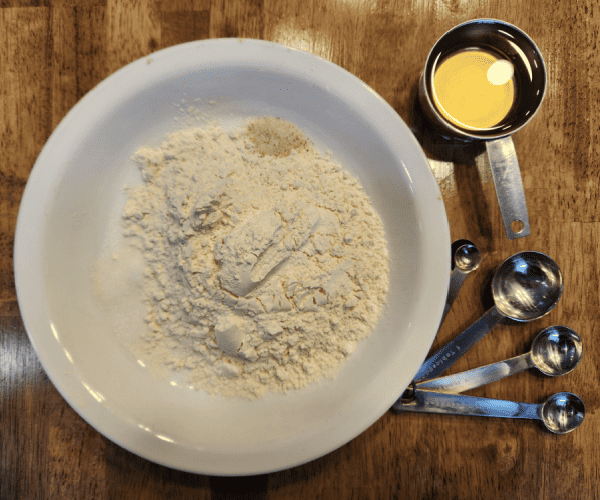
Stir with a fork and then pat pie crust into pan.
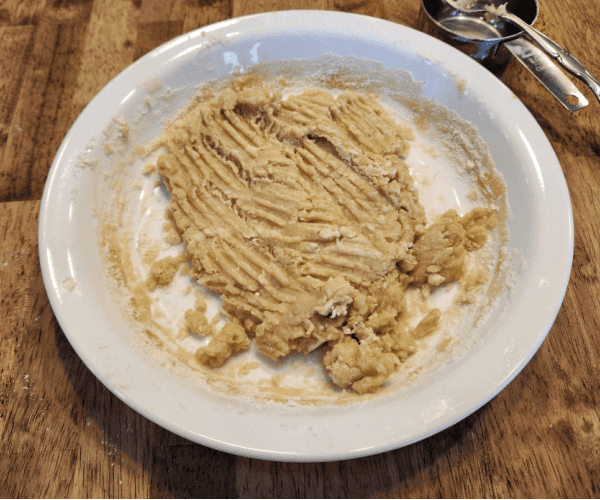
Poke with a fork three or four times, then place in oven for around 10 minutes.
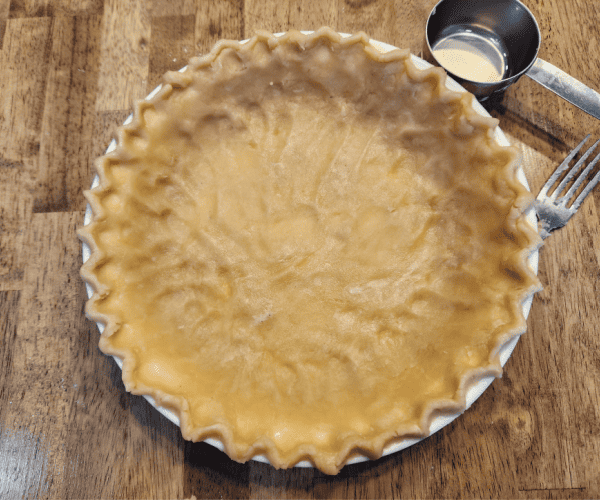
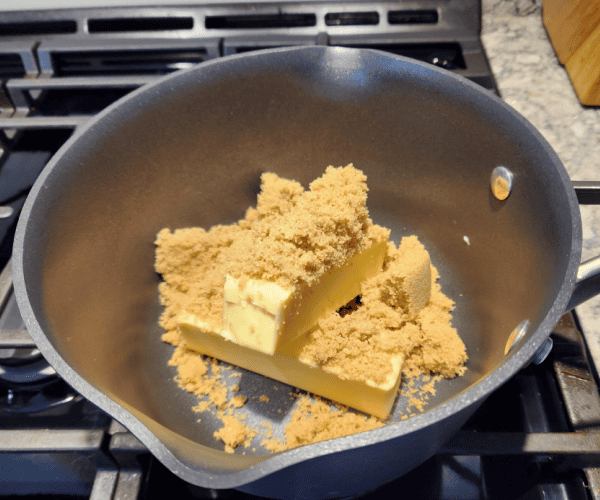
Melt butter and brown sugar in a saucepan on the stovetop.
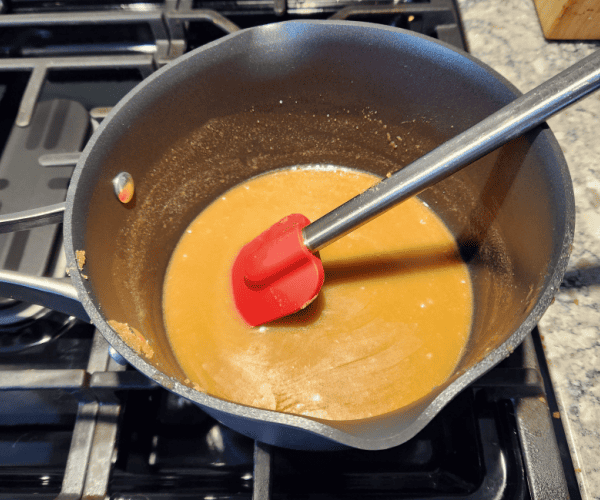
Mix the brown sugar and melted butter til the brown sugar dissolves and becomes smooth. Move to back of stovetop to allow to cool. If it is really warm in your kitchen you can place mixture in the fridge to cool.
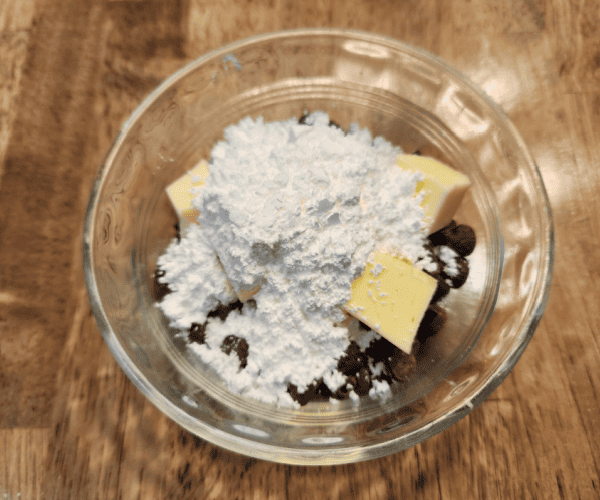
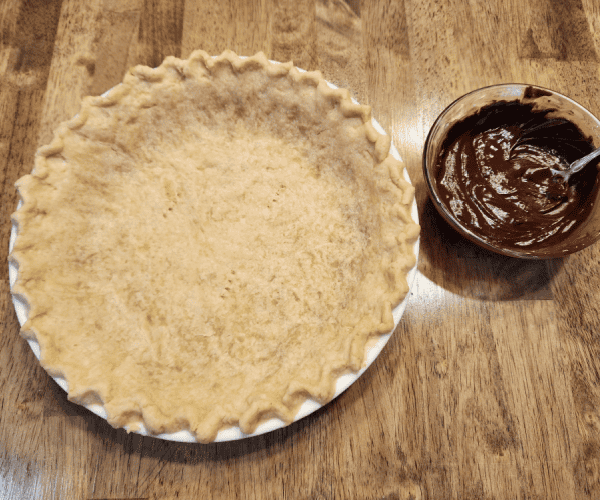
Pull pie crust out of the oven. It should look mostly done, but it does not have to be browned. Cool on wire rack. While pie is cooling, mix up bottom chocolate layer. Place all the chocolate ingredients in a small microwaveable bowl. Heat in microwave for 20 second increments, stirring well in between.
Once chocolate is melted and pie crust is mostly cooled, pour melted chocolate in bottom of pie crust and spread just on bottom of pie crust. Place in fridge for a few minutes to harden.
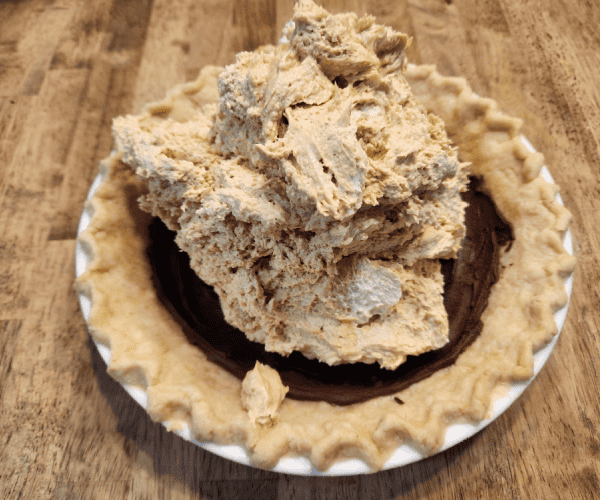
Pour cooled brown sugar butter mixture into a mixing bowl. Blend in creamy peanut butter. Blend for a few minutes til completely blended. Add in cool whip. Mix for 30 seconds, then finishing folding in the cool whip by hand.

Pull pie crust with chocolate layer out of the fridge. Fold all of the peanut butter mixture into pie crust. Carefully spread out peanut butter pie mixture into pie crust. Place back in fridge.
Using the same microwaveable bowl, add the top layer chocolate ingredients. Melt in the microwave, again using small 15 or 20 seconds increments to melt the chocolate slowly. Pour or drizzle the chocolate on top of the pie. Place pie in fridge to allow chocolate to harden, before covering pie with clear wrap!
Dessert Assembly Tips
I’ve found that the secret to a stunning no bake peanut butter pie lies in the finesse of layer assembly.
First off, I always ensure my cool whip is slightly softened. This makes it easier to work with, blending seamlessly with the peanut butter for that magical peanut butter layer. I’ve discovered that a flexible silicone spatula or frosting knife becomes my best friend here, allowing me to spread without tearing the base layer. For the peanut butter pie layer, gently guide the spread to every corner over the chocolate and pie crust.
- Chill each layer before adding the next. This might test your patience, but trust me, it’s worth it. The chill time solidifies your efforts, ensuring each layer maintains its integrity.
- Experiment with spreading tools. While I swear by a spatula, an offset spatula or even the back of a spoon can offer unique textures and patterns.
- Embrace a little imperfection. No bake means no stress. If your layers aren’t museum-worthy, remember, it’s the taste that’ll win hearts. Besides, a little rustic charm has its appeal.
Take your time, enjoy the process, and watch as your no bake peanut butter pie, a no cream cheese marvel, takes shape.
Serving Suggestions
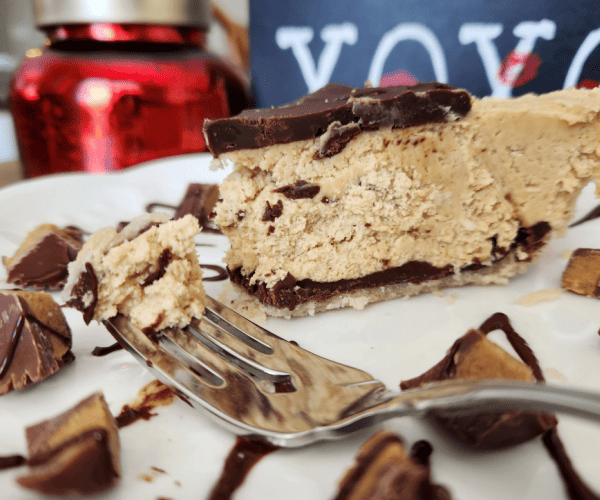
Let the pie sit at room temperature for a few minutes before you slice it. This small step makes a world of difference. The textures soften slightly, allowing the creamy peanut butter layer and the rich chocolate to meld together beautifully. And it makes it easier to cut through the top chocolate layer.
This peanut butter pie with cool whip is very rich. So I cut the pieces small. If I let guests cut their own, they slice it too big and can’t eat it all, wasting the pie. Now, I cut the pie myself, making the portion size smaller. Everyone enjoys the pie without over indulging or being unable to finish!
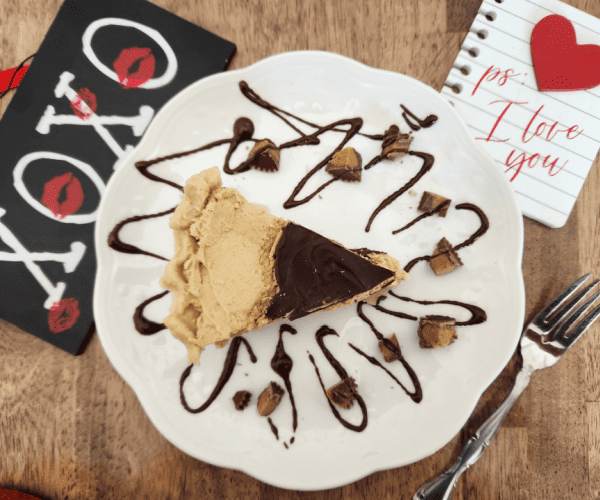
Pairing the pie with coffee is perfect! A cup of coffee on the side – its bitterness contrasts well with the sweet richness of the pie. If coffee isn’t your preference, a glass of cold milk complements the childhood classic flavors of peanut butter and chocolate, wrapping you in a blanket of nostalgia.
Storing Your Pie
Your pie can be made the day ahead! And stored in the refrigerator, the chocolate peanut butter pie will stay delicious for several days. I find that covering it properly is where the magic lies. A tight seal, either with a pie carrier lid or a wrapping it in cling wrap, wards off unwanted fridge odors and prevents the pie from drying out. Enjoy!
No Bake Peanut Butter Pie
Equipment
- Mixer
- 1 9 inch pie pan
Ingredients
Homemade Pie Crust
- 1 1/2 cup flour
- 1 tsp sugar
- 3 tbls milk
- 1/2 cup canola oil
- 1 tsp salt
Chocolate Layer
- 1/2 cup chocolate chips
- 1 tbls butter
- 3 tsp milk
- 1/4 cup powdered sugar
Peanut Butter Pie
- 1 cup butter
- 1 cup brown sugar
- 1 cup peanut butter
- 12 oz cool whip 1 1/2 containers of cool whip
Chocolate Topping
- 1/2 cup chocolate chips
- 1 tbls butter
- 3 tsp milk
- 1 1/2 tsp corn syrup
Instructions
- Pull your cool whip containers out of the freezer, if they are still frozen, to thaw on counter.
- Turn on oven to preheat to 350 F
- Pour all your pie ingredients directly into a 9 inch pie pan.
- Stir with a fork and then pat pie crust into pan.
- Poke bottom of pie crust with a fork three or four times, then place in oven for around 10 minutes.
- Next, melt butter and brown sugar in a saucepan on the stovetop.
- Mix the brown sugar and melted butter til the brown sugar dissolves and becomes smooth. Allow to cool. If it is really warm in your kitchen you can place mixture in the fridge to cool.
- Pull pie crust out of the oven. It should look mostly done, but it does not have to be browned. Cool on wire rack.
- While pie is cooling, mix up bottom chocolate layer. Place all the chocolate ingredients in a small microwaveable bowl. Heat in microwave for 20 second increments, stirring well in between.
- Once chocolate is melted and pie crust is mostly cooled, pour melted chocolate in bottom of pie crust and spread just on bottom of pie crust. Place in fridge for a few minutes.
- Pour cooled brown sugar butter mixture into a mixing bowl. Blend in creamy peanut butter. Blend for a few minutes til completely blended.
- Add in cool whip. Mix for 30 seconds, then finishing folding in the cool whip by hand.
- Pull pie crust with chocolate layer out of the fridge. Spread out peanut butter pie mixture into pie crust. Place back in fridge.
- Using the same microwaveable bowl, add the top layer chocolate ingredients. Melt in the microwave, again using small 15 or 20 seconds increments to melt the chocolate slowly. Pour or drizzle the chocolate on top of the pie.
- Place pie in fridge to allow chocolate to harden, before covering pie with clear wrap!
